Wednesday, July 29, 2015

Getting ready for fall!

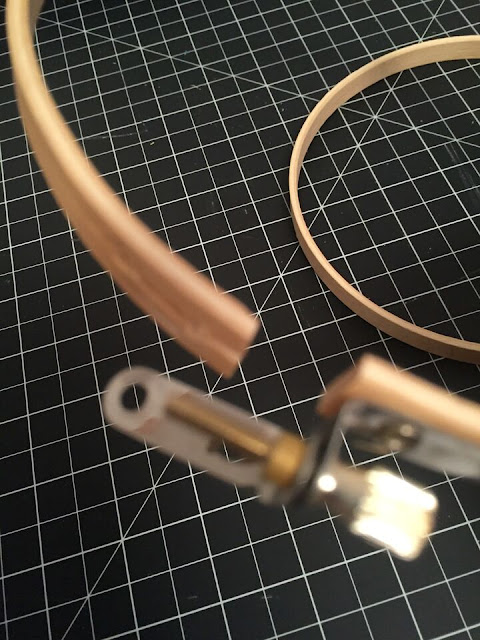
Last week I posted about the hoop art I was creating for my bedroom wall. Well, one of my embroidery hoops didn't fare to well when I ran over it with the wheels of my chair in my craft room. Oops!! 
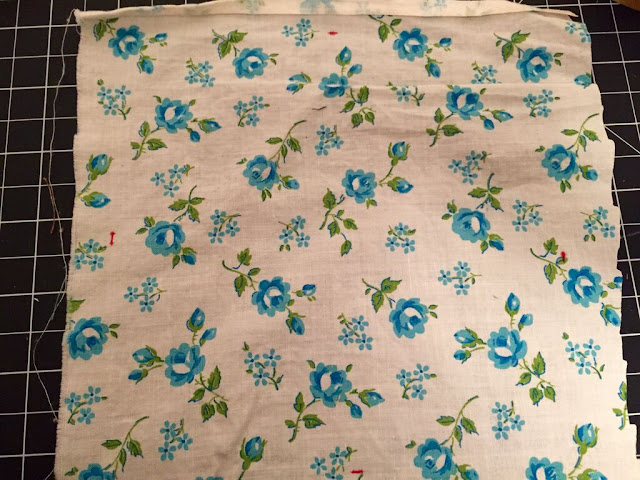
I didn't want to just throw it away so I decided to make a fall wreath out of it! I took out all my fall colored scraps of fabric that I have been saving up from various projects and cut 6 inch x 1 inch strips out of it. I just eyeballed this part so some strips were different widths then others.
Then I just started tying the strips of fabric around my embroidery hoops. I pushed my strips together tight to make my wreath more full. After you complete your wreath twist the fabric strips different ways to fluff it up more!

Here is my finished wreath ready for my door for fall!

Here is another example of an embroidery hoop wreath I made back in the winter with scraps of fabric. There are endless ways you can spruce up your door with these hoops!

Laura

Friday, July 24, 2015

Frame By Frame

I'm headed to a family reunion this week, so I didn't have a lot of time to work on projects. I decided to do a quick redo on another one of the picture frames from my stash.
I found this picture at a yard sale, and though my husband liked the duck in the picture I decided I could put the frame to better use. So I removed the picture and lightly sanded the frame to make sure the spray paint would stick.
Next I spray painted the frame again in a shade of blue (if you can't tell...blue is my favorite color). It took a couple turns to get all the little nooks of the frame covered, but I love this blue!!

I spray painted the mat a light gray, but not sure how I feel about it yet...may repaint it white. Then I printed one on my favorite quotes on some map paper and here you have it! Just remember the meaning and enjoy each day.
Sorry to cut this one short, but I'm off to visit with family. Have a great weekend y'all!!!
 
 
Kelli

Wednesday, July 22, 2015

Fun Hoop Art!

I love decorating my home with homespun decorations and artwork. A cheap and easy way to spruce up any wall is with hoop art. The sky is the limit with what you can do with the inexpensive wooden embroidery hoops that you can pick up at any craft store. Above my bed I have started putting together a hoop art collage. 
On the ones I have hanging so far, I simply cut a square of fabric, placed it tightly into the embroidery hoop and then trimmed the excess fabric. I can't wait to add more hoops to this wall collage to make it a focal point of my room.
This hoop was made by centering up a quilt block I had made in a quilting class and trimming off the excess fabric. This will be a perfect addition to my bedroom wall collage!
To get started making your own hoop art. Pick up any size embroidery hoop and go through your stash of fabric scraps to find some coordinating prints.
I laid the inner ring of the embroidery hoop on my background fabric and marked it on four sides with a red marker so I could better center my design on my fabric.
I cut a variety of scrap fabric I had on hand into bunting flags and strips and arranged them on the fabric to get them aligned.
Then I sewed down the bunting on my sewing machine to create the string of the bunting design.
Place your fabric in the hoop and tighten it up. Then flip it over and trim the excess fabric closely to the edge of the hoop.
I simply love the finished product. A simple, cheap and easy way to add a little homespun charm to your home. 

Laura


Friday, July 17, 2015

Easy Picture Frame Redos

Ever noticed when you go to a yard sale or browse through a thrift store the number of old pictures and picture frames people have decided to get rid of? Maybe the picture in the frame no longer matches their interior, or they just decided they don't have room for that picture anymore. Well, I have found that every picture frame has a purpose and can be repurposed into many things. I recently picked up several old picture frames, and hope to show you several ways that you can redo those pictures before you just though them out.
Picture Frame Haul....

And More....

The first project I decided to do is super easy that anyone with a computer or a quick stop by your local craft store can do. I decided to work with this little frame first. The lady I bought it from at the flea market said the picture inside came free with the frame. LOL
 
 
Seems all picture frames are either brown or black, but I can easily change that with some spray paint in one of my favorite colors.
 
 
After a couple coats, and cleaning the glass she was ready for something special.
 
Thanks to my trusting computer, I decided to print up a little saying that I know to be fact. I love my family!
 
 
Only thing about taking a picture of a picture is it never shows the details as they really are, and there is always a glare or a shadow or your reflection. It was such a beautiful day outside, so I decided you could best see this picture off of my back deck.
Stay tuned for more great picture frame projects!!!
 
 
Kelli


Tuesday, July 14, 2015

Thrift Store Art

When I shop thrift stores, I love browsing through all the discarded artwork. It always fascinates me to see what people once decorated the walls of their home with. There are usually many great pieces but the frames or matting may not be today's treading colors, but with a little updating or re-purposing they can be loved and enjoyed again. This is a picture I purchased at a local thrift store. It was a hand embroidered piece and was even signed/dated by the lady who made it. I immediately had to purchase it because for one it was a timeless piece, and I could also tell a lot of work and love probably went into creating this piece. It had even been professionally framed.
I loved all the detail in the houses in the picture. This one even had a quilt hanging off the front porch! 
The only problem with the picture was the blue and mauve matting that encased it. These were the trendy colors in the late 1980s and early 1990s. My Mom used these same colors in our home at the time. But in 2015, you don't find these colors in many homes anymore so I knew with a few changes I could make this artwork fit into someone's home today. This particular piece had craft paper back so I took my utility knife and carefully removed it.
I pulled up all the metal tabs holding the artwork in place with the same utility knife. 
Carefully remove the artwork from the frame. Fortunately since this one had been professional done this was easy to remove as everything had been mounted to a foam board. Then separate the artwork from the matting. 
Now its painting time! These can be sprayed painted or painted by hand. I had plans to spray paint the matting on this particular piece, spray paint lays smoother and cuts down on time but the weather wasn't cooperating for me to be outside so I resorted to hand painting it with some of paint stash that I bought on the mis-tint shelf at Lowe's. I choose white for the outer mat and a robin's egg blue for the inner mat. 
A few hard lessons I learned while painting this was one, start with the outer mat first. As you can see here I started on the inner mat and when I went to paint the outside navy mat I got a few stray brush marks on the inner mat that I had to go back and touch up. Also, it would have been best to spray paint the whole mat white first, then go back in with my inner border color. Since the outer mat was such a dark blue it took several coats of white to cover it up. But I finally got it!

Just let it dry overnight and then place it back around your artwork. Clean your inner glass of your frame with a clean cloth and then place your artwork back in the frame and re-secure the tabs. 
The final result is now a timeless piece that can be used in almost any home for generations to come. The white matting really lets the artwork be the focus of the piece now. I left the frame the natural wood, but this could have been sprayed painted also. I may go back and paint it black eventually but I will live with it like this for now. I just love the character and charm of this picture. 

Laura

Saturday, July 11, 2015

Finishing Granny's Quilt

When my Granny passed away she left a legacy of talent in the family, one of which is my Aunt Linda who's creativity never ceases to amaze me. In a recent family get-together I noticed that my Aunt had a quilting loom set up in her living room where she was quilting by hand.
Currently I am taking a quilting class, so I am intrigued by any and all quilts. Not just for the colors and beauty of the quilt, but for the work and love that goes into each quilt that is made.
These quilt blocks are known as the tic-tac-toe pattern.
Here you see where Linda is actually doing the quilting. This is where you sew together the decorative top, followed by batting which adds the thickness to the quilt, and then a back fabric is added. This sandwich of fabric and batting is quilted together basically making one very warm blanket to curl up under once complete.
The white chalk lines you see are where she will sew her quilting stitches. This classic stitch is known as the fan quilting pattern.
In talking with my Aunt she told me that the topper for this quilt was actually sewn by my Granny (who has now passed away) and she was finishing it up by quilting it. I treasure every quilt ever made and given to me by my Granny. She made each with hard work and love which makes them more valuable than any other items I own. This beautiful quilt, however goes to my cousin Lisa.
My Aunt talked about how hand quilting can be very time consuming for one person, so I expressed the idea of starting a family quilting bee. Several of us gathered around stitching away and gossiping about all the family members who aren't there, what could be better?! I love my family time!
 
 
Kelli


Thursday, July 9, 2015

Family Hand-Me-Downs and Flea Market Finds...


On a recent trip to my local Flea Market, I found this cute little round side table. I hadn't seen one like it before, and thought it could be a cute bedside table or look great in an entry way.
It had several knicks and dings, so I thought it best to sand out a few, but keep some because it gave the piece character. Sanding it turned out to be a lot of work.
 
I got it all put back together and decided to paint it light blue. I found a DIY recipe for homemade chalk paint, and gave it a try. It took 2 coats of paint and then 1 coat of wax. I didn't want to distress this piece. I liked just the clean paint with all the little bumps and dings that added a story of where this piece has been over the past 30 years.
So, I'm feeling pretty good about the job I've done on the table, but it just seemed to look lonely. It needed some dressing up. I dug through some old family junk and came across a bedside lamb straight out of the '60s/'70s that I think may have belong to my twin aunts, but somehow it ended up in my shed.
The green has definitely run its course, so I decided to paint it yellow. Then there was the shade which had obviously seen better days, so I took some cardboard to rebuild the shade and added some cute fabric for a spin of whimsy.


Once I finished the lamp, I put the whole project together. Now the project looked bright and happy!
 
I added a few of my favorite books for decoration, and could not be more pleased with the outcome! Now on to the next flea market find or family hand-me-down....stay tuned!!
 
 
Kelli


My first big project!

My Mom found this beauty at the flea market a few years ago. When I started taking upholstery class she let me take it to use as my first chair to try my hand at upholstering.
It is a beautiful side chair but definitely needed updating! Up first, labeling all the sections of the chair so it will be easier to put it back together. Always keep the fabric you are taking off the chair as intact as possible so you can use it as your pattern for your new fabric.
Now time for the deconstruction! Make sure to pull all the staples and tacks out of any project you undertake that way your new fabric and padding will lay on smooth and you don't want to risk shooting through old nails or staples.
Once your project is bare, clean up any wood imperfections with wood filler and sand lightly. At this point you can paint or stain your project. Since this was my first project I didn't do anything to the wood but I can always go back with the Howard's Restor-A-Finish I used in this project to smooth out any scratches on the wood. Since this chair was in good shape structurally, I just add scrap pieces of fabric to the back in seat to create a base to hold the new foam and batting.
After the foam seat and batting was layered on I started adding the new fabric to the seat. We found this beautiful off white fabric at our local Joanne's Store. They always have a good selection of fabrics for upholstery and home decor projects and with their coupons its usually a good bargain!
After the seat fabric was stapled on, I trimmed up the excess.I started working on the seat back of the chair by adding a layer of batting and the front peices of fabric then turned the chair around and finished off the back of the chair with a nice finished edge.  I put batting on the arms and covered them with fabric and finished the chair with a trim of welting.
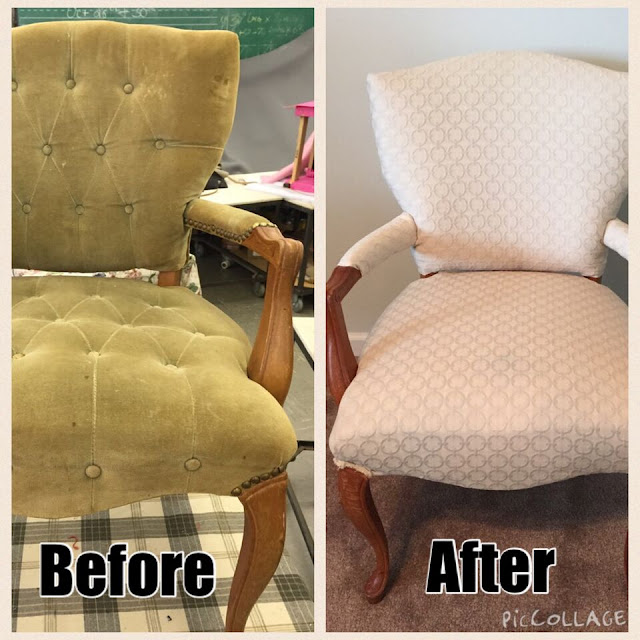
Here is the before and after! There are definitly some imperfections in the chair but I pretty proud of it with it being my first big project. I had a awesome teacher who guided me and helped me along the way! I hope this inspires you to try your hand at an upholstery project. Start small, find a inexpensive project at a thrift store or yard sale for your first project don't spend a lot of money on expensive fabric so if you mess up cutting you aren't out a lot of money. Always buy a little extra fabric to have a buffer for mistakes. If I can do this, anyone can tackle small upholstery projects around their home!

Laura