Showing posts with label Laura. Show all posts

Sunday, August 16, 2015

Laura's Vacation 2015

I've been MIA the past few weeks so I'm trying my best to get back into the swing of things this week! 2 weeks ago, I had the wonderful opportunity to go on a vacation to Myrtle Beach with my family. It was so nice getting to stay in one house with my husband, my parents, siblings and their spouses and my nieces and nephews for the week. I was hoping to get away to go shopping in the local antique and thrift stores but we were having so much fun as a family I never got away to go picking. 
The weather was wonderful. We got a few rain showers during the week but they didn't stick around for long. 
We feasted on yummy crab legs and other delicious foods during the week at various restaurants. The dinner pictured above is from Captain George's. It was my fav! We also took turns cooking some dinners at our beach house. 
We played miniature golf one night and walked around several of the area shopping venues. The picture above was taken at Barefoot Landing, which is a nice shopping area and has tons of restaurants and shops.
I had heard of the tv show, Myrtle Manor so we went to find the trailer park that it had been filmed at while we where in Myrtle Beach. Even though I hadn't ever watch the show, it was neat to go exploring where it was filmed. 
On our last night there me and my husband took a walk on the beach and the fireworks were amazing that were being shot off. It was a good ending to a perfect week.
We had such a fun, relaxing time none of us wanted to leave. Most of our time was spent just hanging out at the beach or pool and  spending time together as a family. It definitely flew by too fast! It was nice creating lasting memories with my loved ones. 

Wednesday, July 29, 2015

Getting ready for fall!

Last week I posted about the hoop art I was creating for my bedroom wall. Well, one of my embroidery hoops didn't fare to well when I ran over it with the wheels of my chair in my craft room. Oops!! 
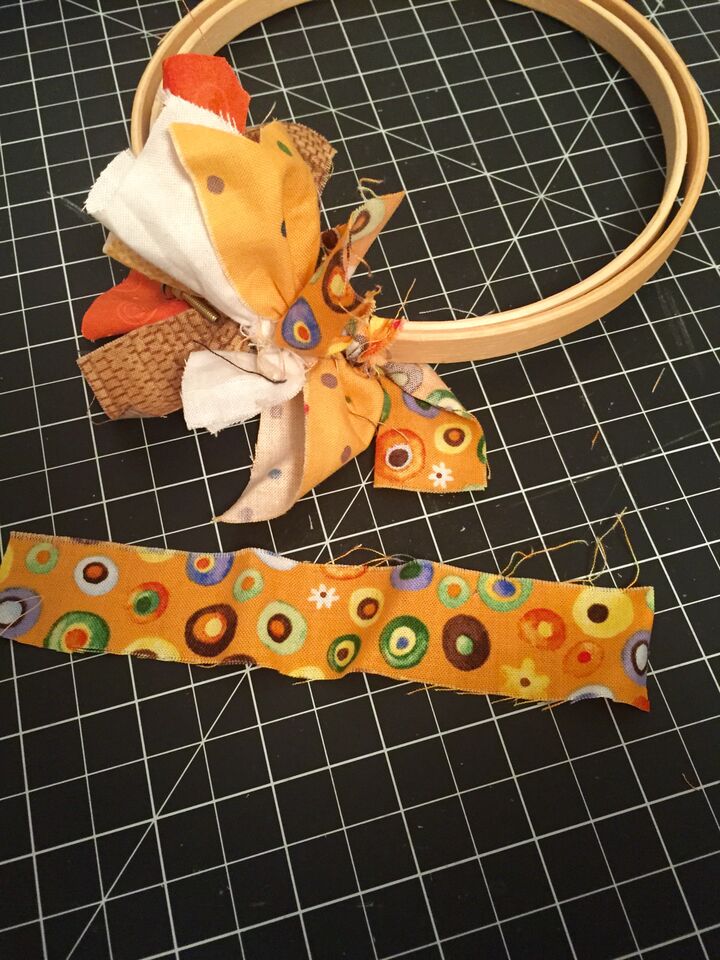
I didn't want to just throw it away so I decided to make a fall wreath out of it! I took out all my fall colored scraps of fabric that I have been saving up from various projects and cut 6 inch x 1 inch strips out of it. I just eyeballed this part so some strips were different widths then others.
Then I just started tying the strips of fabric around my embroidery hoops. I pushed my strips together tight to make my wreath more full. After you complete your wreath twist the fabric strips different ways to fluff it up more!

Here is my finished wreath ready for my door for fall!

Here is another example of an embroidery hoop wreath I made back in the winter with scraps of fabric. There are endless ways you can spruce up your door with these hoops!

Laura

Wednesday, July 22, 2015

Fun Hoop Art!

I love decorating my home with homespun decorations and artwork. A cheap and easy way to spruce up any wall is with hoop art. The sky is the limit with what you can do with the inexpensive wooden embroidery hoops that you can pick up at any craft store. Above my bed I have started putting together a hoop art collage. 
On the ones I have hanging so far, I simply cut a square of fabric, placed it tightly into the embroidery hoop and then trimmed the excess fabric. I can't wait to add more hoops to this wall collage to make it a focal point of my room.
This hoop was made by centering up a quilt block I had made in a quilting class and trimming off the excess fabric. This will be a perfect addition to my bedroom wall collage!
To get started making your own hoop art. Pick up any size embroidery hoop and go through your stash of fabric scraps to find some coordinating prints.
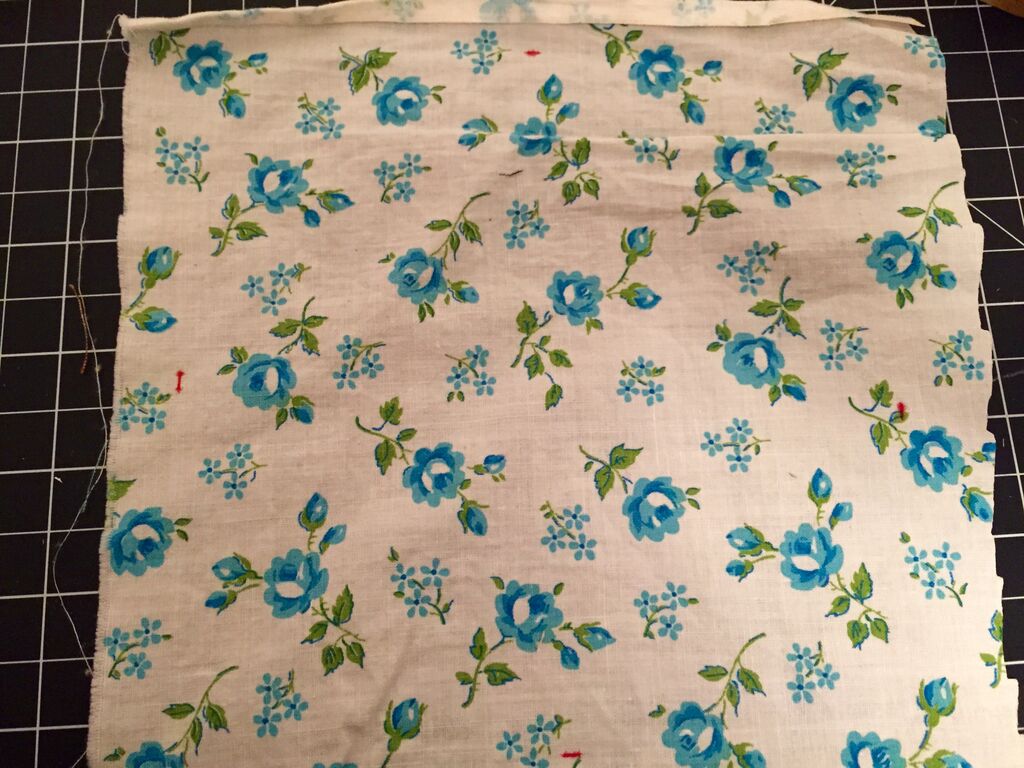
I laid the inner ring of the embroidery hoop on my background fabric and marked it on four sides with a red marker so I could better center my design on my fabric.
I cut a variety of scrap fabric I had on hand into bunting flags and strips and arranged them on the fabric to get them aligned.
Then I sewed down the bunting on my sewing machine to create the string of the bunting design.
Place your fabric in the hoop and tighten it up. Then flip it over and trim the excess fabric closely to the edge of the hoop.
I simply love the finished product. A simple, cheap and easy way to add a little homespun charm to your home. 

Laura


Tuesday, July 14, 2015

Thrift Store Art

When I shop thrift stores, I love browsing through all the discarded artwork. It always fascinates me to see what people once decorated the walls of their home with. There are usually many great pieces but the frames or matting may not be today's treading colors, but with a little updating or re-purposing they can be loved and enjoyed again. This is a picture I purchased at a local thrift store. It was a hand embroidered piece and was even signed/dated by the lady who made it. I immediately had to purchase it because for one it was a timeless piece, and I could also tell a lot of work and love probably went into creating this piece. It had even been professionally framed.
I loved all the detail in the houses in the picture. This one even had a quilt hanging off the front porch! 
The only problem with the picture was the blue and mauve matting that encased it. These were the trendy colors in the late 1980s and early 1990s. My Mom used these same colors in our home at the time. But in 2015, you don't find these colors in many homes anymore so I knew with a few changes I could make this artwork fit into someone's home today. This particular piece had craft paper back so I took my utility knife and carefully removed it.
I pulled up all the metal tabs holding the artwork in place with the same utility knife. 
Carefully remove the artwork from the frame. Fortunately since this one had been professional done this was easy to remove as everything had been mounted to a foam board. Then separate the artwork from the matting. 
Now its painting time! These can be sprayed painted or painted by hand. I had plans to spray paint the matting on this particular piece, spray paint lays smoother and cuts down on time but the weather wasn't cooperating for me to be outside so I resorted to hand painting it with some of paint stash that I bought on the mis-tint shelf at Lowe's. I choose white for the outer mat and a robin's egg blue for the inner mat. 
A few hard lessons I learned while painting this was one, start with the outer mat first. As you can see here I started on the inner mat and when I went to paint the outside navy mat I got a few stray brush marks on the inner mat that I had to go back and touch up. Also, it would have been best to spray paint the whole mat white first, then go back in with my inner border color. Since the outer mat was such a dark blue it took several coats of white to cover it up. But I finally got it!

Just let it dry overnight and then place it back around your artwork. Clean your inner glass of your frame with a clean cloth and then place your artwork back in the frame and re-secure the tabs. 
The final result is now a timeless piece that can be used in almost any home for generations to come. The white matting really lets the artwork be the focus of the piece now. I left the frame the natural wood, but this could have been sprayed painted also. I may go back and paint it black eventually but I will live with it like this for now. I just love the character and charm of this picture. 

Laura

Wednesday, July 1, 2015

Happy One Month Anniversary!

We cannot believe it has been one month since we first started our blog, and sharing our adventure with you. It has been such an unbelievable first month. We have met and connected with so many incredible bloggers across the world, and enjoyed all the love and comments from our new followers. We look forward to continuing to share our journey with you all!!
 
Thank you and much love to everyone!!
Laura and Kelli

Tuesday, June 30, 2015

A look behind the scenes....

To kick off the 1 month anniversary week of Homespun and Redone, we want to give you a glimpse into the life of the faces behind our blog!

Hey y'all! I'm Laura. And that in the background is my pride and joy, my baby, my Kawasaki Teryx Side by Side. I'm a work-aholic but going 4-wheeling in the beautiful mountains around the south is one of my favorite hobbies!
I even drag race and do sled pulls from time to time!
I live with my husband and two dog babies in beautiful East Tennessee at the foothills of the Smoky Mountains. My whole family lives here, it's a wonderful place to grow up! I would never dream of leaving here well.... unless I scored a beach house! Ha!
About a year ago, me and my aunt started taking an upholstery class through our local school system. I fell in love with it! That's one of the ways the blog came into fruition with my friend Kelli. We both wanted a platform to share our passion of repurposing discarded furniture to the public and to give inspiring tutorials! Here is the link to my Mamaw's Rocking Chair Redo! 
Some other random things about me, for one I'm obsessed with owls! I think I really have a problem! Anytime I see owl fabric at the fabric store I usually buy it. I have little owls tucked all over my house on display. This is my owl mug that I scored a few months ago! So cute!!
I have been doing bible journaling for a few months now. I'm a visual and creative person. So I love being able to illustrate what I read in my journaling bible. I pick up tape, stickers, pens, and scrapbooking supplies whenever I find them on sale to add to my collection.
When I'm not working, 4-wheeling, hanging out with family/friends or working on repurposing projects I love to take sight seeing trips around our area. This picture is from Cades Cove in the Smoky Mountains.
And last but especially not least, I like to do all these things with my favorite man, my husband, Michael by my side!

Laura

Wednesday, June 24, 2015

DIY: Easy Turban Style Headbands

I have invested a small fortune in headbands to wear at the gym and on my four wheeling trips but every last one of them end up slipping off my head. I can never keep them on, even the ones advertised as non-slip! I thought I'd try making my own out of jersey knit fabric so I could customize it to my head size. After a little trial and error I finally came up with a headband that fits perfect and best of all no slippage!! It stays in place all day!

You can make your own too with these simple steps. First pick out some cute jersey knit fabric out of your stash or from your local fabric store. You can also upcycle t-shirts from your closet!
Next I cut 2 strips of fabric 5" wide by 21" long. This is the length that worked best for my head but you can always measure around your head to get a size better for you. Remember the jersey stretches so I cut mine a little smaller than my actual measurement. You can also play around with the width of the headband to make it wider or thinner to best suit your style.
Fold each strip length wise, right sides together and sew a straight stitch the entire length to create a tub. While sewing your straight stitch take your time and go slow because the jersey will shift on you and want your seam as straight as possible.
Turn the fabric tube so the right side of the fabric is facing out.
Next lay each strip of fabric, with the seam in the middle, in a plus (+) shape.
Fold the vertical strip over the horizonal strip until the ends meet.
Then fold the horizonal strip over so its ends meet. So both strips are interlocking.
Bring all 4 ends together and sew a straight stitch to close off your headband. 


Trim off any excess fabric and flip right side out! That's it, a super quick, super cute headband that's perfect for summer! With all the cute fabrics out today the possibilities as endless! We will have an Etsy Shop coming soon with a variation of this headband as well as many other homespun and redone creations! 
Laura

Tuesday, June 16, 2015

Oh Birds of My Soul....

It was love at first sight when I spotted this fabric at Joann's. I knew I had to find a project to display it on!
My Mamaw (which is southern for Grandmother...lol) had a great, old rocking chair she needed repaired and upholstered so I knew instantly this is the fabric we should use on it! My Mamaw agreed, so me and my aunt deconstructed and repaired the chair in our upholstery class.
We added new webbing underneath the chair to reinforce the new springs we put in. Next we tied off the springs and I filled all the cracks and deep scratches with wood filler. Then it was time to sand it down!
After lightly sanding the rocker, we knew we wanted to just restore the natural wood, so I rubbed on Howard Restor-A-Finish with steel wool. The key with using this product is working in small areas at a time and wiping off the excess Restor-A-Finish with a clean rag after you rubbed it in with the steel wool.
After going over the whole chair with Restor-A-Finish, I let it dry overnight and then waxed it with Howard Feed-N-Wax. Again, work with this in small areas and rub in with a cotton rag then go back over with a clean rag and wipe off the excess. This stuff smells amazing and makes your wood surface so smooth! This was my first time using the Howard brand products and I will definitely be using them again on future projects!
That old rocking chair was really shining after this rub down!
Next came building back the chair with new foam, cotton and batting.
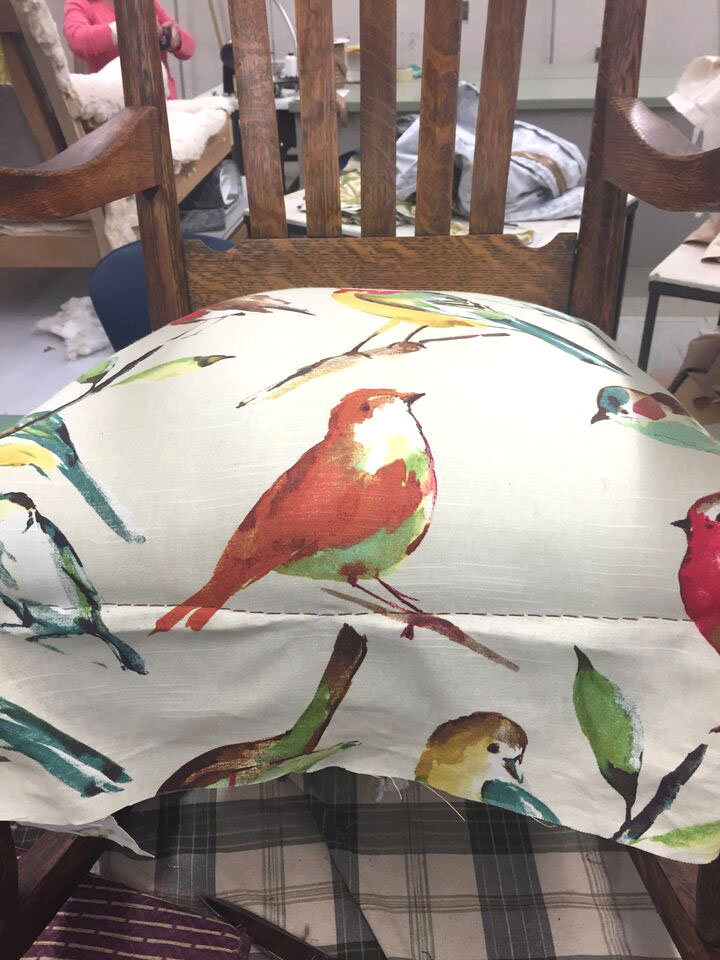
Now time for that beautiful bird fabric I had been waiting for!
I trimmed the fabric from the seat and finished the edge with a brown decorative trim. The old foam back cushion was still in good shape so I sewed a new cover for it and placed it on the chair. This is the finished rocking chair when it was delivered to my Mamaw's house. She LOVED it! 
Laura