
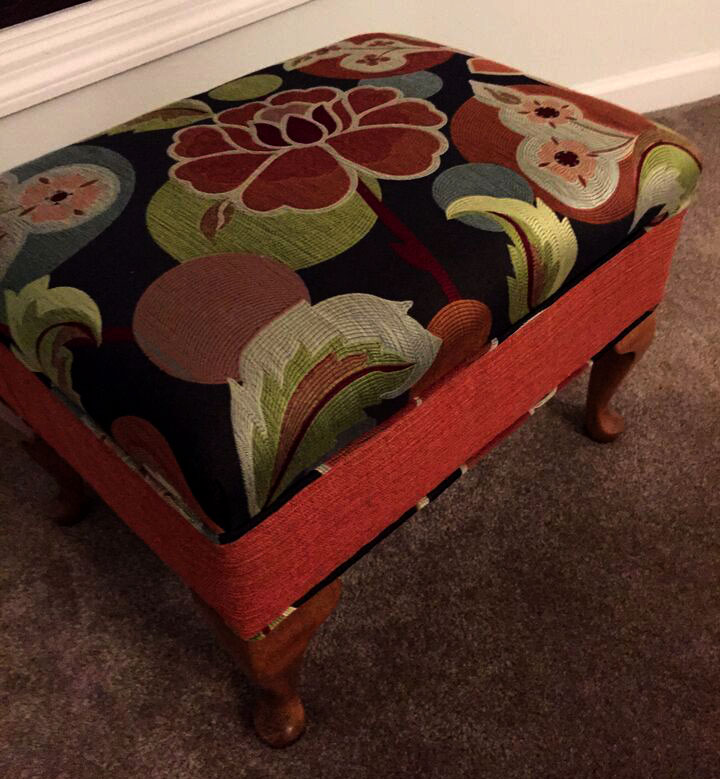
Last year I started taking an upholstery class. The first project I took to work on was this foot stool that my Mom came across a few years ago. It had seen better days. The fabric was worn in some spots, the batting was no longer evenly distributed, and the pattern was outdated.

I started by removing the legs and stripped all the layers of fabric, batting, and staples until all that was left was a wood box. Next I added a thin piece of foam and layered batting to make the top full and evenly distributed. One thing to remember when you take apart furniture to re-upholster is always keep the old fabric pieces that you remove, so then you can use them as your pattern for the new material. This way there is no guessing. If there are multiple pieces, be sure to label them (ie: back, front, right arm, etc.). I did just that on this piece. I laid out my new fabric and used the old pieces as my pattern. I always cut my new fabric a little larger to err on the side of caution. You can always take away fabric if its to much but its hard to fix mistakes with too little fabric. I sewed my welting that would be used as the trim. I then stapled on the top piece of fabric making sure to center the design. Always work from the middle out to each corner when stapling on fabric. This makes it easier to create clean pleats on the corner. Then I stapled on the welting to create a clean trim line.

Next came another stripe of batting to cover the exposed wood and to create a full look for the side fabric covering. The side piece was stapled on by holding the fabric with the wrong side towards myself and placing staples onto the bottom edge of the orange fabric to the bottom edge of the welting. Once this is stapled all around your piece you flip down the side fabric so that the right side of the fabric is now facing out and tucking under the raw edge to create a clean line when the orange fabric meets in the back.

Finish it off by attaching a stripe of welting to the bottom of the piece creating the finishing trim. The only thing left is stapling on a dust cover and attaching the legs back onto the piece.
The key is don't get intimidated by upholstering or refinishing furniture. Pay close attention to the construction of the piece, take photos during the deconstruction process, and label your old fabric pieces. This will help everything fit back together easily for you as you reconstruct the piece.
Here is my finished product back at my Mom's house for her to enjoy!
A little before and after!

Laura
No comments:
Post a Comment