Showing posts with label Toys. Show all posts

Monday, August 31, 2015

Another Happy Princess

At the recent "Princess" birthday party, a friend of my cousin's asked if I would be willing to make her little princess a dress up station for her birthday. She needed it by the end of August, so that didn't leave much time. However, nothing makes me happier than seeing those little smiling faces when they are playing with their new present, so I was more than happy to do it for her.


I came across this one time entertainment center at one of my local thrift stores, so I took it home and got started right away.


First came the sanding, and then the priming. I don't care what anyone says. The actual paint goes on much better if you just take the time to lightly sand and prime your piece. I know people hate doing it, I don't think its all that fun, but if you want your piece to look like it should....take the time.

Next came the paint. I had the Mom go online to Lowe's website and pick a color from the Valspar color selector. That way I was sure to get exactly what she wanted for her little princess. Once the paint dried, it was time to decorate.


The little princess likes butterflies, I was told, so we went with that theme. I love the "BeYOU*itful" sign. Every little girl needs to know that being yourself is the most beautiful person in the world. Finally came delivery day, and smiles all around. So happy to see another satisfied princess!


Kelli


Tuesday, August 11, 2015

Desk Redo and visits from Arendelle

Another birthday under my belt...
The little princess turned 4 years old this year, and my husband and I had decided she needed a desk to get her ready for school. We found this old school desk at a local antique shop. It was exactly what I was looking for cause I have been dying to try chalkboard paint.
It had a few cracks and scratches, but we only wanted to fix issues the might hamper the use of the desk. Keeping most of those cracks and scratches is what gives the piece character.


Next I sanded both the chair and the desk and started painting the chair.

It took several coats of paint to cover the chair, but that is my fault as I failed to prime the chair first. The more I refurbish furniture, the more I realize that if I just take a moment to prime a piece with spray primer the actual paint goes on much easier and takes a lot less time to cover.

I did not make that mistake with the desk. I took 5 minutes to spray prime the desk the was able to paint the desk much quicker than the chair with only 2 coats....the chair took 4 coats plus touch ups.
After all the pink paint, I got the top painted with the chalkboard paint and got the desk put all back together. My husband felt all the pink needed something, so we added a few decals along with the name on the back of the chair.

 
Finally finished and off to the "Princess" birthday party. There were little princesses everywhere, and even a visit from Queen Elsa and Princess Anna.


 Kelli
Sunday, June 28, 2015

Pretty Little Princess

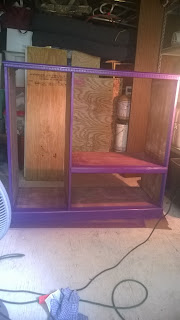
In an earlier post I showed you how I loved being able to give repurposed items as gifts, especially to my little cousin on her birthday. Well, last year for her 3rd birthday my husband and I took on our biggest project yet with the intent to give this princess her very own dress-up station.
We actually started with an old entertainment center that had been passed down through the family, and I knew would have somewhat of a sentimental value as well as enjoyment.

We cleaned and sanded the surface so the paint would adhere to the wood.

Then the painting began. Pink and purple...aren't those every little princess' favorite colors.

Next we put in a hanging bar for all the dress-up clothes, then added the back. I decided to paint the back white to brighten it up, and then added the pink and purple flower decals for decoration.
Of course there had to be a full length mirror so the little princess could admire herself from head to toe. This was not an easy find, until I came across an old medicine cabinet at the flea market with the perfect size mirror. We removed the mirror from the cabinet, glued it onto a piece of plywood painted purple, then added it to the door frame.
Now it was time to put it all together.

 
Several accessories were added for those final touches, but the best part was to watch how these two little princesses knew exactly what to do at only 3 years old!


I don't think we will be able to out do this birthday redo, but the next birthday is coming up soon....stay tuned to see what is in store for birthday #4!


Kelli